Do you cherish your old electric skillet, but it’s not heating like it used to? Perhaps your once-reliable appliance is now prone to scorching, undercooking, or refusing to heat at all. Before you relegate it to the back of the cupboard or, worse, the trash, consider a simple yet impactful solution: replacing the probe control. Often, this small component is the culprit behind inconsistent temperatures, and a DIY replacement can breathe new life into your cherished cookware, saving you money and extending its useful lifespan.
What is an Electric Skillet Probe Control?
The electric skillet probe control is the unsung hero of your appliance, the brain behind its consistent cooking temperatures. This detachable or sometimes integrated unit houses a thermostat that monitors the skillet’s internal temperature and signals the heating element to turn on or off, maintaining your desired heat setting. When this critical component falters, your cooking suffers.
Common signs of a failing probe control include erratic heating, where the skillet gets too hot or not hot enough, sometimes cycling wildly between extremes. You might also experience no heat whatsoever, or the appliance could display error codes. Without an accurately functioning probe, your skillet loses its ability to cook evenly, leading to frustrating results and potentially ruined meals.
Why Replace Your Electric Skillet Probe Control?
Replacing a malfunctioning probe control offers several compelling advantages, making it a worthwhile endeavor for any home cook.
Cost-Effectiveness
|
Our Picks for the Best Electric skillet in 2026
As an Amazon Associate I earn from qualifying purchases.
|
||
| Num | Product | Action |
|---|---|---|
| 1 | Elite Gourmet EG-6203# Extra Deep 16"x13"x3.2" (10.5Qt.) Scratch Resistant, Easy Pour Spout Dishwasher Safe, Non-stick Electric Skillet with Glass Vented Lid, Adjustable Temperature, Black |

|
| 2 | Elite Gourmet EG808 8” x 8" Non-stick Electric Skillet, Dishwasher Safe with Tempered Glass Vented Lid, Rapid Heat Up, 600W, Black |
|
| 3 | Presto 06857 16-inch Electric Foldaway Skillet, Black |
|
| 4 | FOHERE 16-Inch Electric Skillet with Glass Cover, 1500W Rapid Heat, Adjustable Temperature, Multi-Purpose Electric Skillet Fried Chicken, Perfect For Family Gathering Cooking |
|
| 5 | Nuwave Medley XL Digital Electric Skillet, Family Size Griddle w/Glass Lid, 2025 New & Improved Precision Heating, 100°-425°F, PFAS Free G11 Nonstick Ceramic Coating, Portable Hot Plate, 7qt Capacity |
|
| 6 | bella Make & Take Electric Skillet, Fits-anywhere™ kitchenware, EverGood™ Ceramic Coating, Adjustable Temperature & Dishwasher-Safe Tempered Glass Lid, Cast Aluminum Base, 1200 Watt, Oatmilk |
|
| 7 | Pioneer Woman 3.5L Electric Skillet, Linen Speckle |
|
| 8 | Elite Gourmet EG6201 Extra Deep 12"x12"x3.2" (7.5Qt.) Scratch Resistant Dishwasher Safe, Non-stick Electric Skillet with Glass Vented Lid, Adjustable Temperature, Black |
|
| 9 | Blue Diamond 7QT 5-in-1 Extra Large Electric Skillet, Healthy Ceramic Nonstick Interior, Non-Toxic PFAS-Free, Temperature Control, Stay Cool Handles, Easy Clean, Graphite |
|
| 10 | Elite Gourmet 12"x12"x2.15” Ceralast™ PFAS Free Ceramic Electric Skillet, Dishwasher Safe, Rapid Heat Up, 1200W, Dark Grey |
|
In an age where replacing appliances often seems easier than repairing them, fixing your electric skillet’s probe control stands out as a budget-friendly alternative. A new replacement probe can cost significantly less than purchasing a brand-new skillet, often a mere fraction of the price. This simple repair allows you to extend the life of your existing appliance, preserving its functionality without a major investment.
Enhanced Cooking Performance
The primary function of a probe control is to ensure precise temperature regulation. When working correctly, it guarantees that your skillet maintains a steady heat, leading to perfectly cooked dishes every time. A new, fully functional probe restores this accuracy, preventing the frustration of unevenly cooked food—no more burnt edges and raw centers.
Environmental Benefits
Opting to repair rather than replace is a small but meaningful step toward reducing waste. By giving your electric skillet a second life, you’re contributing to less landfill burden and making a more sustainable choice for your kitchen and the planet. It’s a testament to the value of thoughtful consumption and repair culture.
Types of Electric Skillet Probe Controls
Understanding the type of probe control your electric skillet uses is the first step in a successful replacement. While the basic function remains the same, the method of replacement can differ.
Detachable Plug-and-Play Controls
Most modern and many older electric skillets feature a detachable temperature control unit. This type of probe simply plugs into a receptacle on the side of the skillet. When it malfunctions, the fix is often as straightforward as unplugging the old unit and plugging in a new, compatible one. These are truly “plug-and-play” and require no tools for the actual replacement, though you’ll always want to ensure the power is disconnected first.
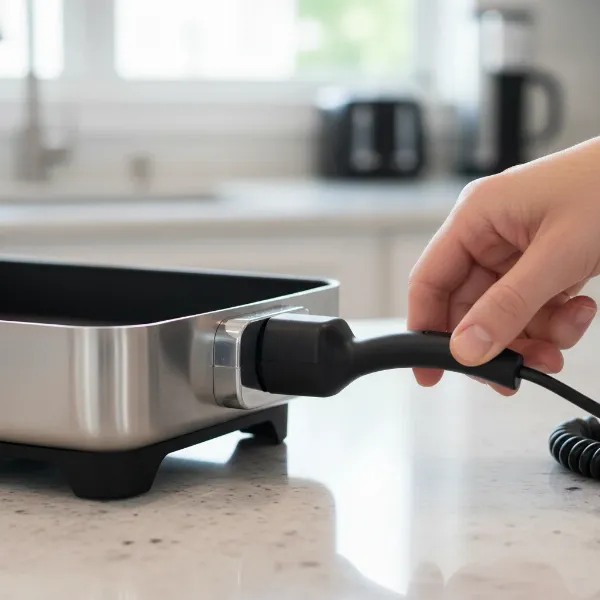 Detachable temperature probe being inserted into an electric skillet, illustrating easy replacement.
Integrated/Internal Probes
Some older or specialized electric skillet models might have a temperature sensor integrated directly into the skillet’s wiring or concealed within its housing. Replacing these internal probes is a more involved process. It typically requires disassembling a portion of the skillet, often by removing screws to access the control panel or base. This type of repair demands more caution, specific tools, and a comfort level with basic electrical work.
Tools and Parts You’ll Need
Successfully replacing your electric skillet probe control requires having the right tools and, most importantly, the correct replacement part.
- New Replacement Probe: This is the most crucial item. Ensure it is compatible with your specific electric skillet model. Check your skillet’s brand and model number against the replacement part’s specifications. Universal probes exist (e.g., the 06900 part number is frequently mentioned), but confirming compatibility is always best.
- Screwdriver Set: If your skillet has an integrated probe, you might need various types of screwdrivers—Phillips, flathead, hex, or even tamper-proof bits—to access internal components.
- Wrench: For integrated probes, a wrench (often 1/2 inch) might be necessary to loosen or tighten compression fittings that secure the probe.
- Multimeter (Optional): A multimeter can be useful for testing continuity and resistance in the old probe to confirm it’s faulty, though it’s not strictly necessary for replacement.
- Safety Gloves (Optional): To protect your hands during disassembly and reassembly.
 Essential tools and a new replacement probe for repairing an electric skillet's temperature control.
Step-by-Step Guide: Replacing Your Electric Skillet Probe Control
Replacing your electric skillet probe control can be a straightforward DIY task, though complexity varies depending on your skillet’s design. Always prioritize safety.
Safety First: Disconnect Power
Before you begin any work on an electrical appliance, always disconnect it from the power source. Unplug the skillet from the wall outlet. This step is non-negotiable and essential to prevent electrical shock or injury.
Identify Your Probe Type
Take a moment to examine your electric skillet. Does the temperature control unit easily detach from the side of the skillet?
- If it’s a detachable unit: You’ll see a clear connection point where the control plugs in.
- If it’s an integrated probe: The control panel or temperature dial will be built into the skillet’s body, and the probe itself will be internal.
For Detachable Plug-and-Play Controls
This is the simplest scenario.
- Unplug the old unit: Firmly grasp the old probe control and pull it straight out of the skillet’s receptacle. Avoid twisting or yanking the cord.
- Inspect the receptacle: Quickly check the skillet’s power receptacle for any visible damage or debris.
- Plug in the new unit: Align the new probe control with the receptacle and push it firmly into place until it’s snug. It should click or slide in securely.
That’s often all it takes for these types of controls!
For Integrated/Internal Probes (More Advanced)
This process requires more care and typically involves opening up the skillet’s base.
- Accessing the Control Panel: Carefully turn your skillet over. Look for screws, clips, or panels on the underside that secure the control assembly. Use the appropriate screwdriver to remove these. You may need to remove legs or handles to gain access to all screws. Some manufacturers use tamper-proof screws or hidden fasteners to make repairs challenging.
- Locating the Probe Connection: Once the panel is removed, you should see the internal wiring and the temperature probe. The probe often extends into the skillet’s cooking surface and will have wires connecting it to the control board or thermostat assembly.
- Disconnecting and Removing the Old Probe:
- Carefully note or photograph the wiring connections before disconnecting anything.
- You might find small nuts securing the probe (often a compression fitting). Use a wrench to loosen these.
- Some probes are held by P-clips or similar fasteners that need to be spread apart with a screwdriver.
- Gently pull the old probe out of its housing. Take care not to damage any surrounding components or wiring.
- Installing the New Probe:
- Insert the new probe into the opening. Ensure it extends to the correct depth (some kits include a gauge, or you may need to measure).
- Secure the probe using the nut or clip, tightening it carefully. Do not overtighten, as this can damage the probe or fitting.
- Reconnect any wiring according to your earlier notes or photographs.
- Reassembling the Skillet: Carefully replace any panels, handles, or legs, and tighten all screws. Ensure all components are securely fastened before proceeding.
Testing Your Repaired Skillet
Once the new probe control is installed, and your skillet is reassembled, it’s time for a test run.
- Plug in the skillet: Reconnect the appliance to a power outlet.
- Set to a low temperature: Turn the control to a low heat setting.
- Observe: The indicator light should come on and then cycle off as the desired temperature is reached. Monitor the skillet’s heating; it should now heat evenly and maintain the set temperature without wild fluctuations.
If the skillet heats properly, congratulations! You’ve successfully replaced the probe control and saved your appliance.
When to Call a Professional or Consider a New Skillet
While many probe control replacements are manageable DIY projects, there are instances when professional help or even a new appliance might be the best course of action. If you encounter significant difficulties accessing internal components, if parts are unavailable for very old or obscure models, or if the repair seems too complex for your comfort level, it’s wise to consult a qualified appliance repair technician. Additionally, if other components, like the heating element, are also failing, the cost and effort of multiple repairs might exceed the value of a new skillet. Always prioritize your safety and know your limits when working with electrical appliances.
Conclusion
Reviving an old electric skillet with a new probe control is a rewarding project that combines practicality with a sense of accomplishment. By understanding the types of controls, gathering the right tools, and following a methodical approach, you can effectively address inconsistent heating and bring your beloved appliance back to optimal performance. Don’t let a faulty thermostat lead to premature disposal. Instead, empower yourself with this simple repair, and enjoy many more years of perfectly cooked meals. Have you ever attempted a similar repair, and what was your experience?
Frequently Asked Questions
How do I know if my electric skillet probe control is bad?
A faulty probe control often manifests as inconsistent heating, where the skillet overheats, underheats, or cycles wildly between temperatures. You might also experience no heat at all, or the control unit’s indicator light might not function correctly. If your food is burning or not cooking through, the probe is a prime suspect.
Are all electric skillet probes universal?
No, not all electric skillet probes are universal, although many “plug-and-play” detachable controls offer broad compatibility across various brands and models. It’s crucial to check the part number and compatibility list with your specific skillet model to ensure a proper fit and function. Using an incompatible probe can lead to performance issues or be a safety hazard.
Can I repair an electric skillet’s internal heating element?
Typically, no. The heating element in most electric skillets is cast directly into the aluminum body of the pan, making it an integrated and non-replaceable component. If the heating element itself has burned out, which is rare, the entire skillet usually needs to be replaced, as it cannot be repaired separately.
Is it safe to replace the probe control myself?
Yes, replacing a detachable, plug-and-play probe control is generally safe for DIYers, provided you always unplug the skillet from the electrical outlet before handling the component. For integrated or internal probes, the repair is more complex and involves working with internal wiring, which carries a higher risk. If you are not comfortable with electrical work, it is best to consult a professional technician.